A – What’s a Group Copy Link
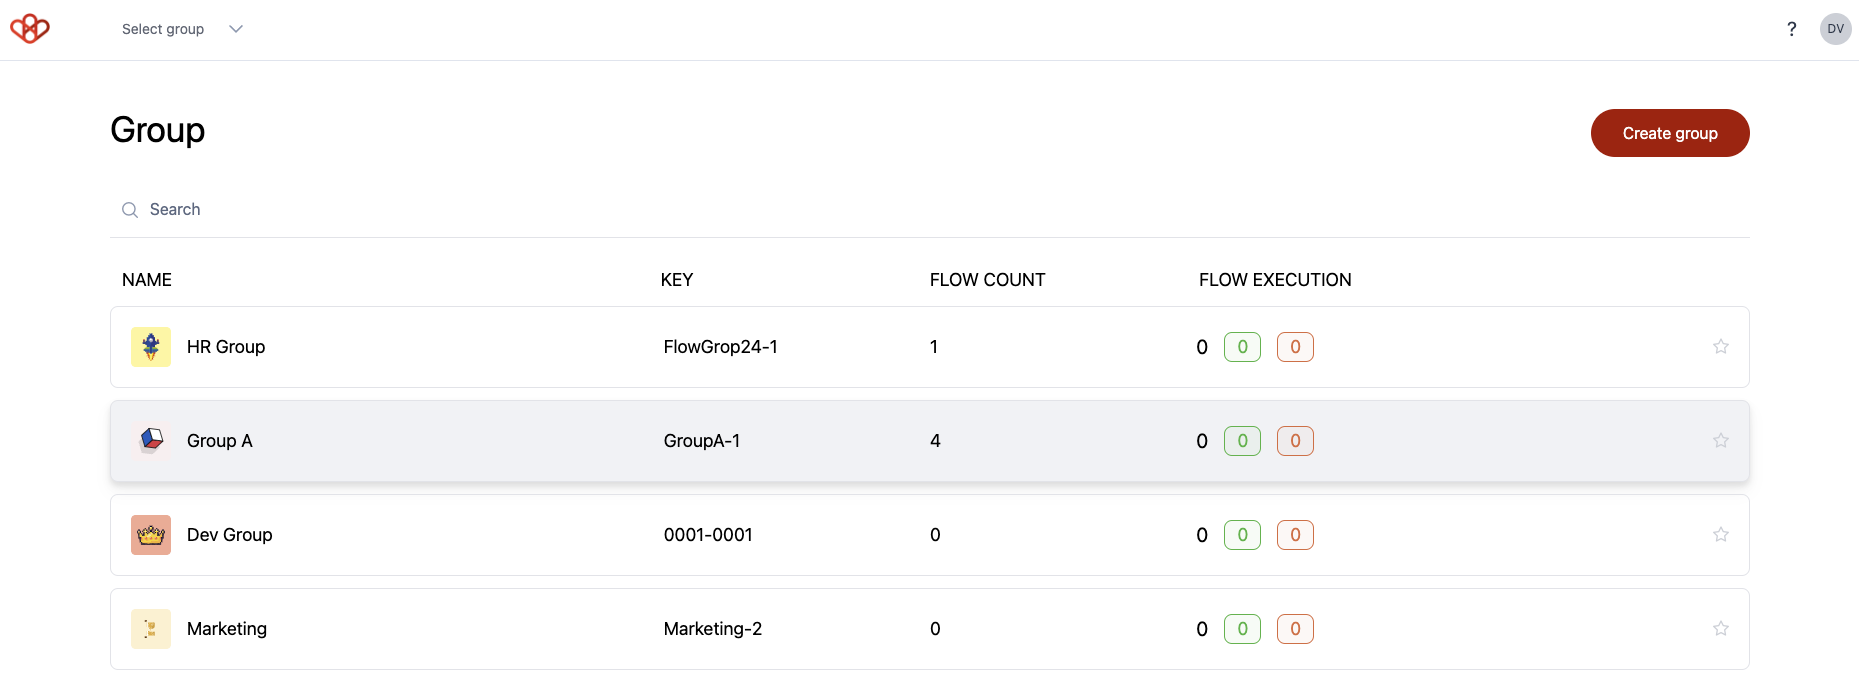
The group system in Wiresk is a way to organize and manage your users and Flows, in fact you can manage multiple groups and users in one place!
When you start with Wiresk(Admin account), you are automatically assigned to the default group. This default group can be renamed.
for users with Pro plan or higher, you can:
- Assign users to specific Flows: Control who has access to and can edit different Flows.
- Organize Flows: Group related Flows together for better management and visibility.
- Manage permissions: Set permissions for different groups, determining who can create, edit, and view Flows.
- Collaborate effectively: Facilitate collaboration among team members by assigning them to appropriate groups.
B – How to create group Copy Link
You can create a group in your profile group tab or by clicking on the dropdown field next to Wiresk logo, then select “View group”.

After selecting “View group”, in the top right corner, click on the red button “Create group”.
Give a name to your group then define a group key number. You can optionally add a small logo to customize your group.
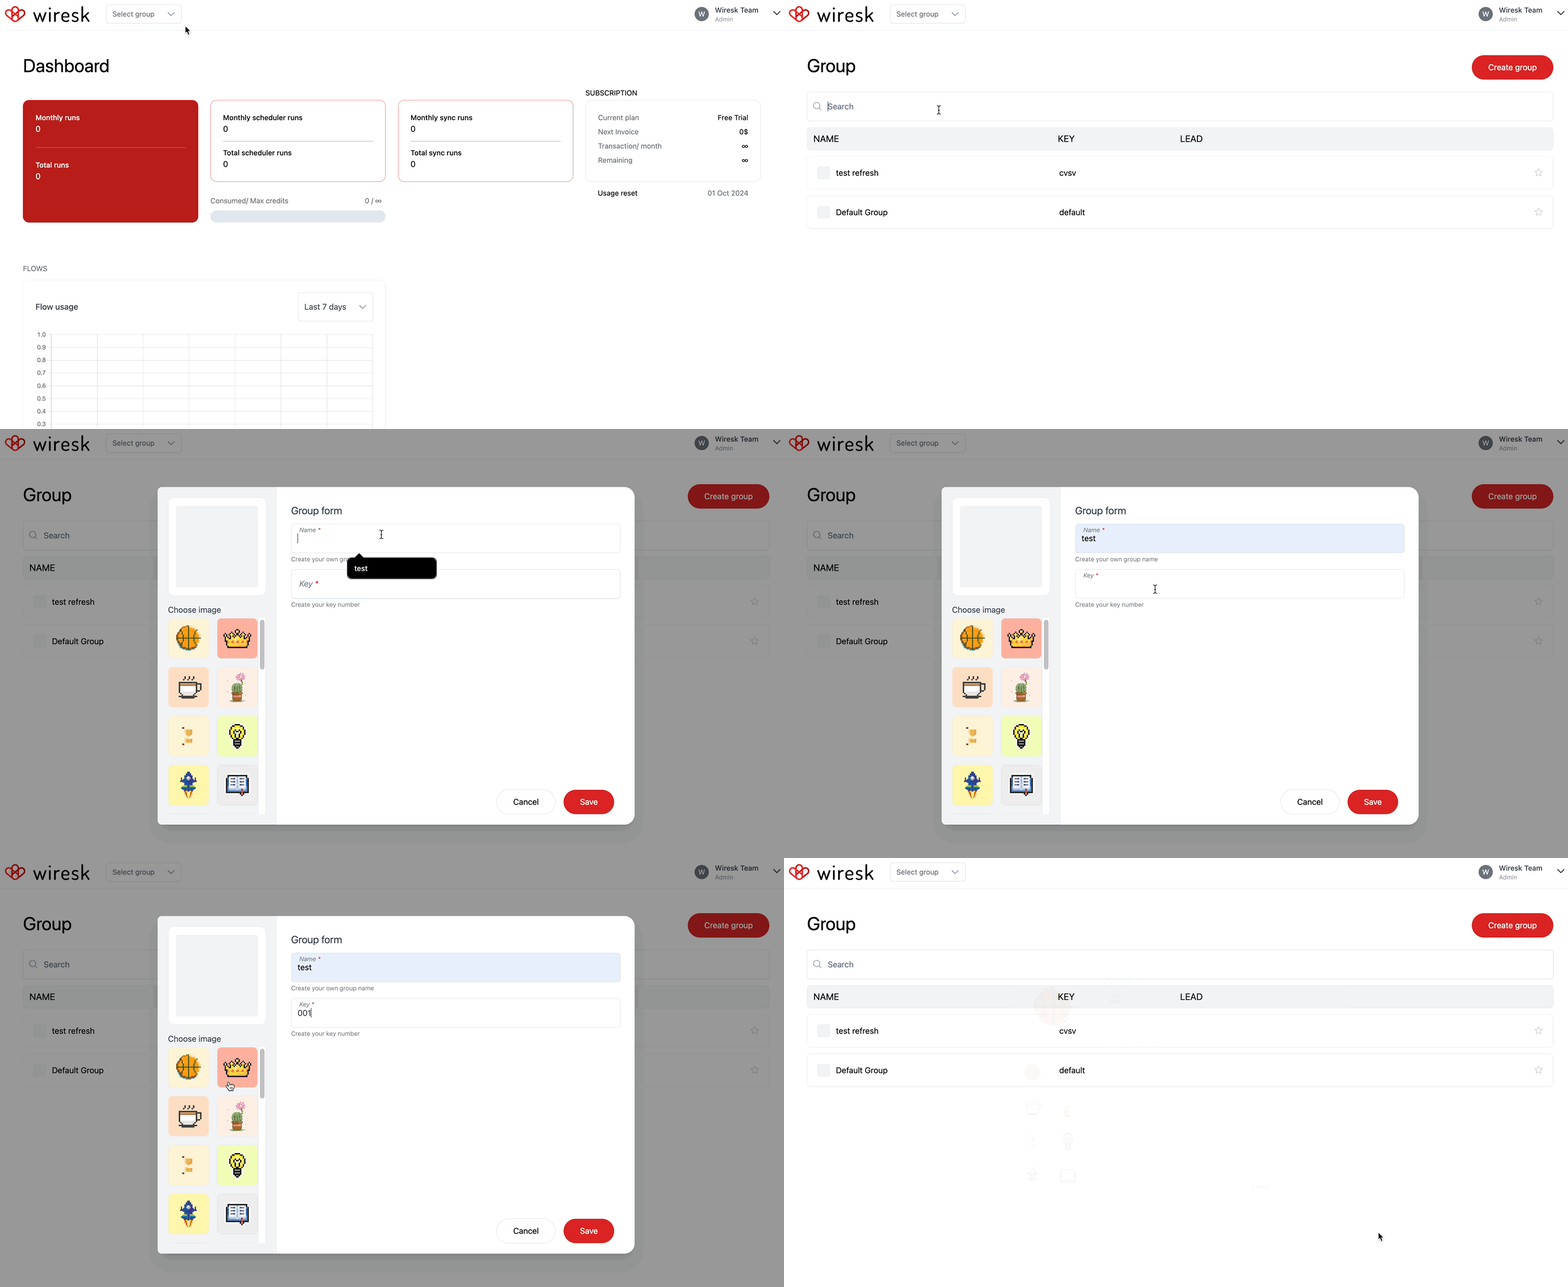
In the group list, select the group that you previously created, then you will be redirected to the Flow section screen.
C – Add users to a Group Copy Link
After the creation of your group, you have the option to add specific users to the group.
Create a user Copy Link
In Wiresk, click on your profile icon in the top right corner, then select USERS.
In the USER page, click on the red button “Create User”.

Fill in the new user creation form. During this step, you can associate a Group to the new user.
Define access and group permissions Copy Link
To set your Group permissions, you can select a “Group permission template” or set all the access and permissions manually.
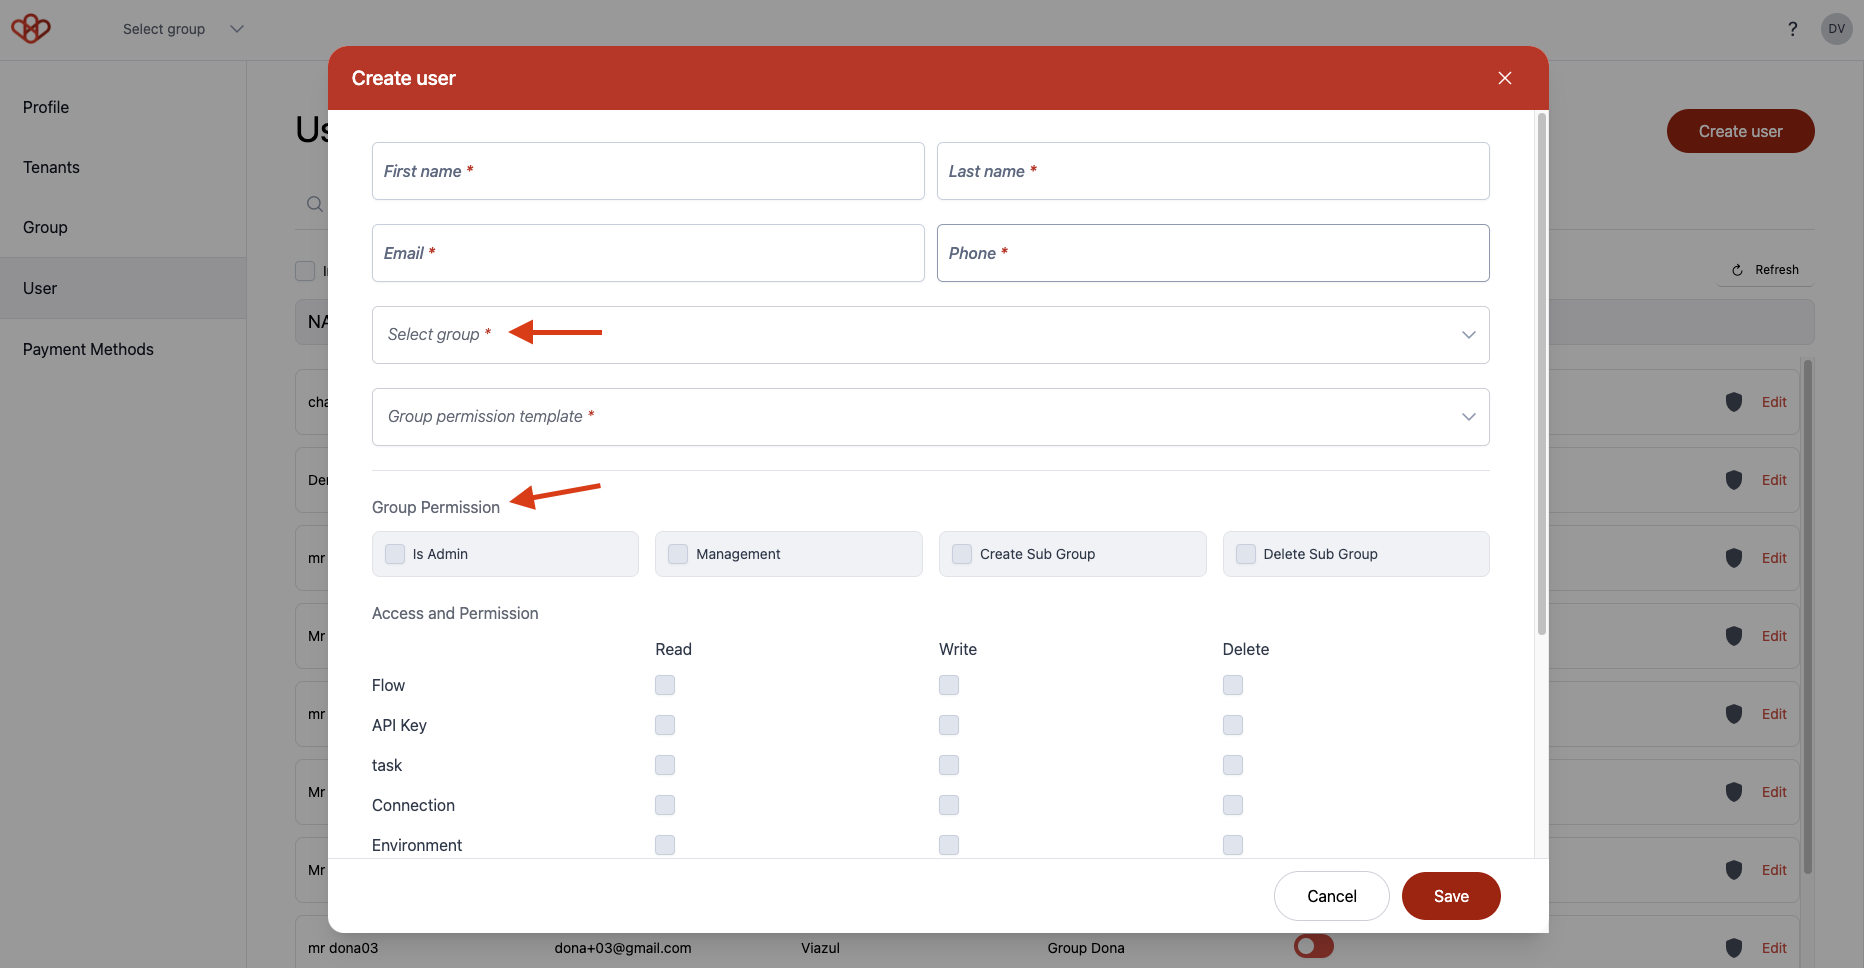
Now, Click on save, and Voila! You have added a user to a Group.
Add users to various Group Copy Link
In Wiresk, you can assign users to 1 or many Groups. To do that, click on the “shield” icon next to Edit option.

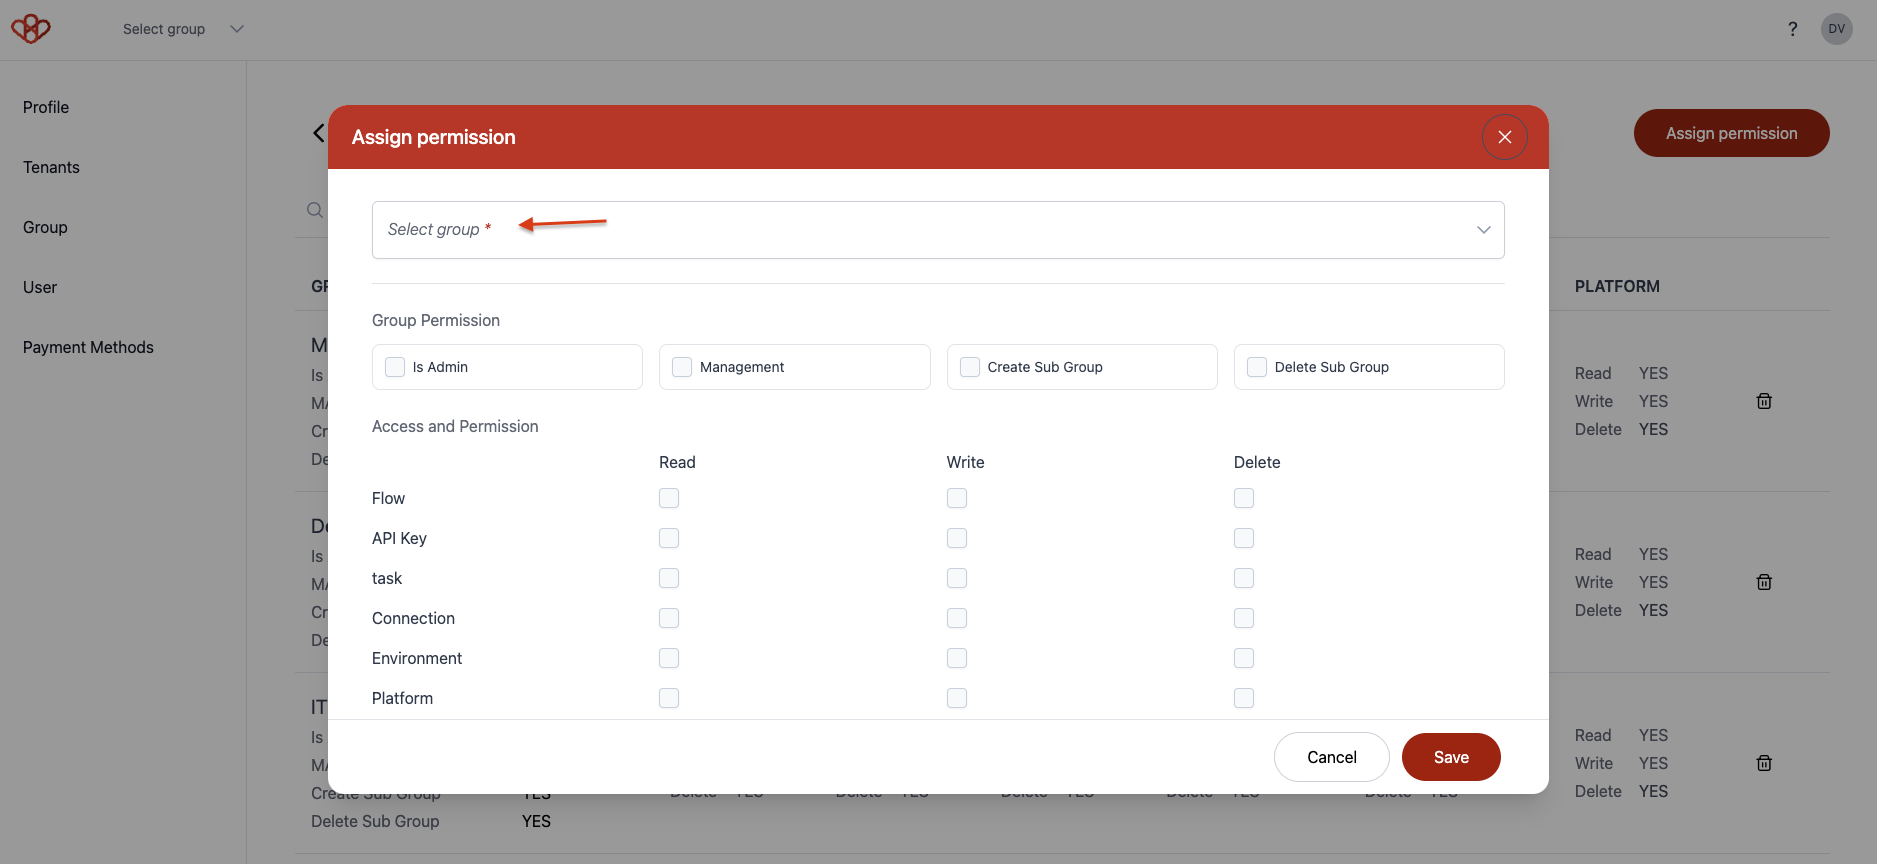
Then click on “Assign Permission” red button.
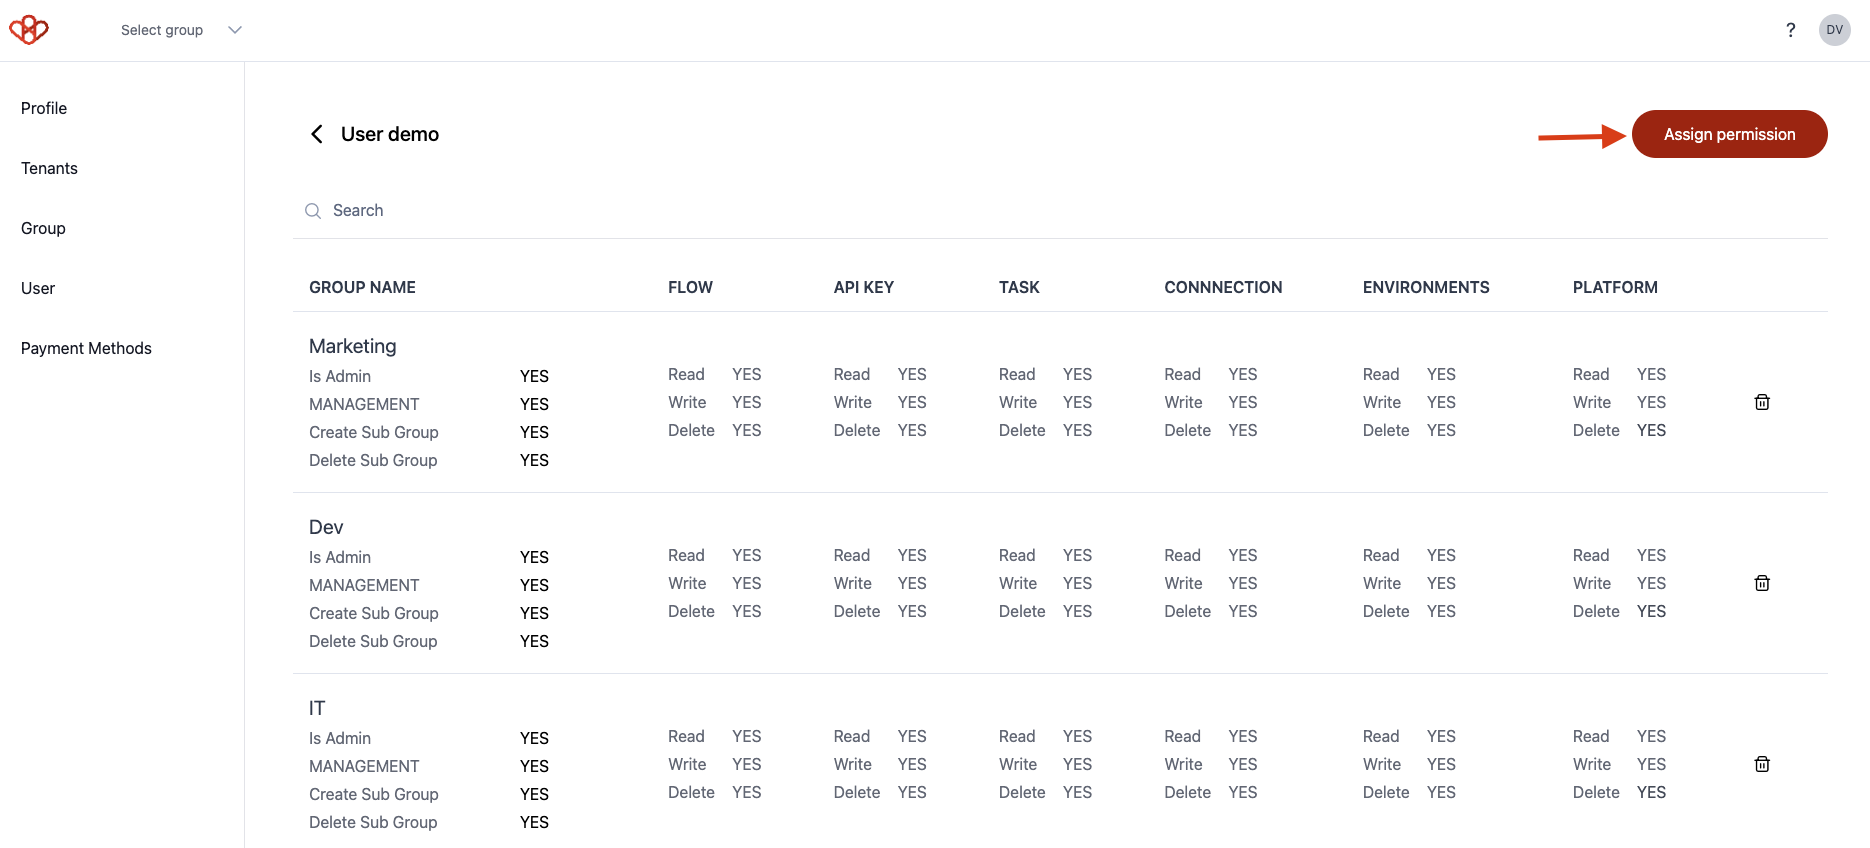
Now you can assign your user to a new group. Repeat the previous steps to assign your user to different groups.
