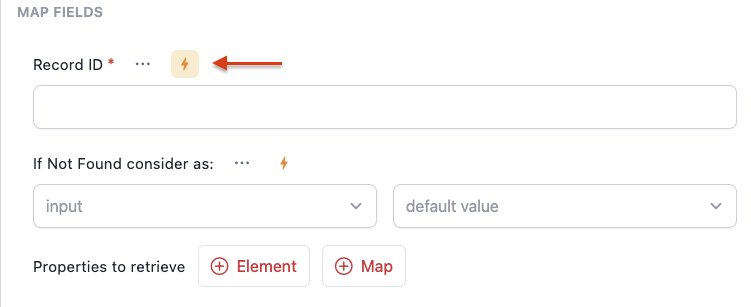
We make sure your data flows seamlessly between apps! For that, Wiresk takes care of retrieving data from your integrated source app and sends it to your destination app, it’s called Field Mapping.
The Field mapping ensures that your data lands in the right place.
In most cases, Wiresk will create the mapping for you based on common field names. However, you can personalize your field mapping as you see fit:
- Simply click on the field you want to map in your destination app.
- Choose your mapping method:
- Flow input: click on the input field, here you can select preloaded data from your Trigger or your Previous Method.
You can Map the “Input “field, by just following the branch of the metadata as in the table below, and select the last metadata name, for example: Data > customer > first_name (select “ first_name “if you want to map this metadata)
Example of field mapping table:
| Metadata | Description |
| Data > order_Number | Order number |
| Data > processed_at | Processed order date and time |
| Data > Customer > first_name | Customer first name |
| Data > Customer > last_name | Customer last name |
This field mapping table will be found in our app documentation according to the Trigger or Method.
- Select from Default Value: If the data is pre-defined, like a status or category, you can choose from a list of options displayed dynamically.
- Manually Input Value: Need to set a specific value for the field? You can enter it directly in the manual input field by clicking on the lightning bolt icon, or couple it with a flow input (preloaded data from Trigger or Method) by typing “@”. In the list that appeared, just select the wanted data field to map.

That’s it! With these options, you can ensure your data is mapped perfectly and customized to match your needs.